Hi! I’m starting to improve my English and a way to do it is translating my old Spanish posts to English. I also hope that these publications can reach many more people on different places of the world.
In this chance we will learn how build a chatbot with Microsoft Azure. For this we need learn some concepts:
Microsoft Azure subscription: For use the Microsoft Azure Services we need have a Azure subscription as for example: payed subscription or students subscription (if you are a student, you can access to free Azure Account with 100$ annuals and other free benefits).
Qna Maker: QnA Maker is an API Service based in the cloud Azure service for create a conversational layer of questions and answers using information of web sites or documents (.pdf, .docx, xlsx, etc.).
Azure Bot Service: Azure Bot Service is a bot developer service to communicate our Azure Bot with another channels as Messenger, Telegram, Microsoft Teams, etc.
Azure App Service: Azure App Service serves to create, implement and scale quickly web applications in the cloud.
Ok! We are going to learn
First we log into Qna Maker with our Azure credentials, then we selected “Create a knowledge base“.

In the second step we will have a page with steps to follow. First we click on “Create a QnA Service” and we will be redirected to Azure portal, in this place we will create a new resources group called “MiPrimerChatBot” using the premium pricing tier. Finally we click on “Review and Create”.

After that, we will return to QnA Maker portal and refresh the page. Now, we will have our new resource called “MiPrimerChatBot”.

For the next step, we will give a name to our Knowledge base, I will name it as “MiPrimeraBaseDelConocimiento”.

As I explained in the first part of this post, we can use documents to create our knowledge base, in this case we will use a document .docx with basic questions and answers about COVID-19. You can download it with a click on the next button:

In the next part, we will go to select the type of bot that we will present in the chat, in QnA Maker we have some types of bot but in this case we’ll use the friendly bot and finally we’ll click on “Create your KB”.

¡Good! Once our knowledge base is loaded in QnA Maker, We’ll be redirected to our knowledge base dashboard and We’ll click on “Save and Train” and next click on “Publish”.

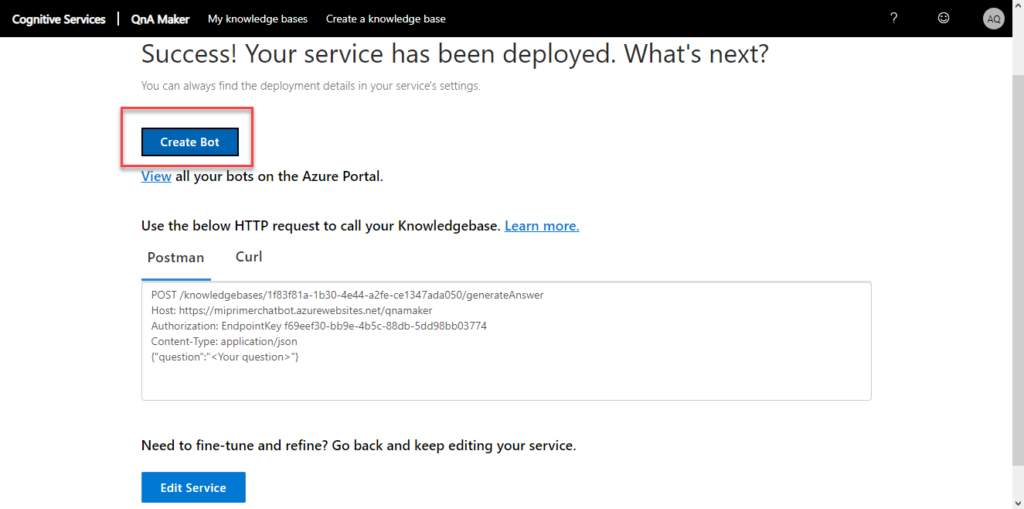
Click again on “Publish” and we have our knowledge base prepared to be implemented on a chat bot. Click on “Create Bot” button.

Now, we’ll be redirected to Azure Portal and we’ll create a Azure Bot, we’ll leave the predefined fields and click on “Create” button.

Now, we need implement our bot using a channel, for this case we’ll go to use the app service created in the group resource of our bot for insert a html code with the bot connection, for this We’ll go to save the End Point Key generated in the last step.

We’ll go to our app service:

Now, We’ll copy the FTP credentials for create the connection FTP with our computer and our app service.

The password of our FTP hostname is in the implementation center of the app service.

For this example, I’ll use the FTP service that I can use in Windows 10 but you can use another FTP client as for example: Filezilla.


Now, we have a connection with our app service and can edit and replace the content.
Azure Bot Service has a default code that we can use in our html code for implement it on our web pages, we can search it in the Azure resource: Web App Bot > Channels.


In the next step, We’ll go to create a html code and insert the html code and replace the text “TU_SECRETO_AQUI” with the secret key of our bot.


Finally, we’ll go to rename the file as index.html and insert it in our app service.

If we’ll visit the url of our app service we can interact with out bot.

Thank you for visit this post, as I explain in the introduction, this is my first post in English, if you have recommendations they are welcome.
If you want to read the Spanish post you can click on https://www.alexquiranza.com/creando-un-chatbot-con-azure/

